Introduction to Plywood Cylinders
Wooden cylinders made of plywood are a versatile and practical addition to various woodworking projects. Their cylindrical shape opens up a world of design possibilities, making them a valuable component in furniture, architectural elements, and other wooden structures. In this section, we will explore the versatility of plywood cylinders and the benefits of constructing them.
The Versatility of Plywood Cylinders
Plywood cylinders offer various uses and applications within the woodworking industry. Their cylindrical shape provides structural integrity and stability, making them suitable for wide-ranging projects. Here are a few examples of how plywood cylinders can be utilized:
- Furniture: Plywood cylinders can serve as legs, supports, or decorative elements in furniture design. From tables and chairs to shelves and cabinets, cylinders made from plywood can add a unique touch to the overall aesthetic.
- Architectural Features: Plywood cylinders can be incorporated into architectural designs to create visually appealing structures. Whether it’s for columns, partitions, or decorative accents, plywood cylinders provide a modern and distinctive look.
- Custom Displays: Plywood cylinders can be used as display stands or pedestals for showcasing products, artwork, or artifacts. They offer a sturdy and visually appealing platform to draw attention to the items being displayed.
- Stage Design: In the entertainment industry, plywood cylinders are commonly used in stage design and set construction. Their lightweight nature and ease of customization make them a preferred choice for creating props, backdrops, and other scenic elements.
Benefits of Constructing Plywood Cylinders
Constructing plywood cylinders brings several advantages to woodworking projects. Here are some crucial advantages:
- Cost-Effective: Plywood is generally more affordable than solid wood, making it a cost-effective choice for constructing cylinders. This allows businesses to create high-quality products while keeping production costs in check.
- Strength and Durability: Plywood cylinders offer excellent strength and durability due to the cross-laminated layers of wood. This construction technique enhances the structural integrity of the cylinders, ensuring they can withstand various loads and pressures.
- Customization: Plywood cylinders can be customized to meet specific project requirements. They can be cut, shaped, and finished to achieve the desired dimensions, angles, and surface textures. This flexibility allows for creative design possibilities.
- Sustainability: Plywood is an environmentally friendly material as it is made from thin sheets of wood glued together. By using plywood cylinders, businesses can contribute to sustainable practices and reduce the demand for solid wood.
By understanding the versatility and benefits of plywood cylinders, businesses involved in woodworking can explore the potential of incorporating these cylindrical elements into their products. Whether for furniture, architectural features, displays, or stage design, plywood cylinders offer an attractive and practical solution. For more information on plywood and its manufacturing process, check out our article on how is plywood made. Additionally, if you’re interested in waterproofing plywood, our article on how to waterproof plywood provides valuable insights.
Planning and Preparation
Before diving into constructing a plywood cylinder, proper planning and preparation are essential to ensure a successful outcome. Here are a few crucial steps:
Selecting the Right Plywood
When selecting plywood for your cylinder project, it’s important to consider the specific requirements of your intended use. Plywood comes in various grades and types, each suited for different applications.
For constructing a plywood cylinder, choosing a high-quality plywood with minimal imperfections is recommended. Look for plywood that is smooth, free from knots, and has a consistent thickness. Depending on your project’s requirements, you may opt for hardwood plywood, softwood plywood, or even marine-grade plywood if moisture resistance is a concern.
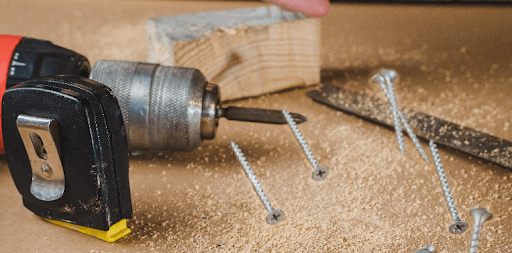
Gathering the Necessary Tools and Materials
To construct a plywood cylinder with precision, you’ll need to gather the necessary tools and materials beforehand. Below is a list of commonly used tools and materials for this project:
| Tools | Materials |
| Circular Saw or Table Saw | Plywood Sheets |
| Router | Adhesive (Wood Glue) |
| Clamps | Sandpaper (Various Grits) |
| Measuring Tape | Finish or Sealant |
| Pencil or Marking Tool | Additional Elements or Features (Optional) |
Ensure that your tools are in good working condition, and consider using appropriate safety equipment, such as safety goggles and gloves, when handling power tools.
Taking Accurate Measurements
Accurate measurements are crucial for constructing a plywood cylinder that fits your specific requirements. Before making any cuts, take precise measurements of the desired dimensions for the cylinder’s diameter, height, and thickness.
Use a measuring tape to measure the dimensions accurately, and mark the measurements on the plywood sheets using a pencil or marking tool. Pay attention to the specific pattern of the plywood’s grain and ensure that the markings are aligned properly to optimize the appearance of the finished cylinder.
Remember to account for any additional elements or features you may want to incorporate into the cylinder design, such as holes or slots for ventilation or wiring.
By carefully selecting the right plywood, gathering the necessary tools and materials, and taking accurate measurements, you are setting yourself up for success in constructing a plywood cylinder with precision.
Cutting and Shaping the Plywood
Once you have completed the planning and preparation phase, it’s time to cut and shape the plywood to create the cylinder shape you desire. This section will guide you through the necessary steps: marking and cutting the plywood sheets, creating a template for the cylinder shape, and shaping the plywood using a router.
Marking and Cutting the Plywood Sheets
To begin, take your plywood sheets and mark the dimensions required for your cylinder. Use a measuring tape and pencil to ensure accurate measurements. Carefully mark the length and width of the sheets, taking into consideration the desired diameter and height of the cylinder.
Once the markings are complete, it’s time to cut the plywood sheets. Use a circular saw or a table saw, ensuring that the blade is appropriate for cutting plywood. Follow the marked lines carefully and make smooth, precise cuts. Take your time to ensure the edges are clean and straight.
Creating a Template for the Cylinder Shape
Creating a template will help you achieve consistent and accurate results when shaping the plywood into a cylinder. Start by drawing a full-scale template of the desired cylinder shape on a large piece of paper or cardboard. This template will serve as a guide for shaping the plywood sheets.
Transfer the measurements from your template onto the plywood sheets using a pencil or marker. Make sure to align the markings accurately to ensure a seamless cylinder shape.
Shaping the Plywood Using a Router
To achieve the curved shape of the cylinder, a router can be used to shape the edges of the plywood sheets. Attach a flush-trim bit or a roundover bit to the router, depending on the desired edge profile.
Carefully guide the router along the marked edges of the plywood sheets, using the template as a reference. Take your time to ensure smooth and even shaping. Repeat this process for all the plywood sheets that make up the cylinder, ensuring consistency across all edges.
Remember to wear appropriate safety gear, such as safety glasses and ear protection, when using power tools like a router.
By following these steps, you can successfully cut and shape the plywood sheets to create the foundation of your plywood cylinder. In the next section, we will explore the various techniques for joining and securing the plywood to ensure a sturdy and durable cylinder.
Joining and Securing the Plywood
Now that you’ve prepared your plywood sheets, the next step is assembling and securing them to produce a robust plywood cylinder. Constructing a cylinder from plywood typically involves wrapping a plywood strip into a cylindrical shape. Here, we’ll break down the steps to guide you through this essential phase.
Choosing the Right Joinery Technique
Selecting the appropriate joinery technique is crucial for ensuring the structural integrity of the plywood cylinder. There are several options available, including butt joints, lap joints, and finger joints. The choice of technique will depend on factors such as the desired aesthetics, strength requirements, and the tools available.
Consider using a technique that not only provides sufficient strength but also aligns with the design of your plywood cylinder. For instance, if you want a seamless appearance, a finger joint or a lap joint could be suitable. Alternatively, if strength is a primary concern, a butt joint reinforced with dowels or biscuits may be more appropriate.
Applying Adhesive and Clamping the Plywood
To create a strong bond between the plywood sheets, applying a high-quality wood adhesive is essential. Begin by applying a thin, even layer of adhesive to the mating surfaces of the plywood sheets. Use a brush or a roller to ensure complete coverage.
Once the adhesive is applied, carefully align the edges of the plywood sheets and firmly press them together. To maintain even pressure and prevent any shifting during the drying process, use clamps strategically placed along the length of the cylinder. Make sure the clamps are tightened securely, but avoid over-tightening, as it may cause the plywood to deform.
Reinforcing the Joints for Added Strength
While the adhesive and clamping provide initial strength, reinforcing the joints can further enhance the durability and longevity of the plywood cylinder. One effective method is to add reinforcing elements such as wooden dowels or metal fasteners, depending on the size and thickness of the cylinder.
By drilling holes through the plywood at appropriate intervals and inserting dowels or fasteners, you can reinforce the joints and prevent them from separating or weakening over time. This additional measure of strength will ensure that your plywood cylinder withstands the test of time.
Remember, the quality of the plywood and the precision of your joinery work are crucial for the overall strength and stability of the plywood cylinder. Choosing the right joinery technique, applying adhesive properly, and reinforcing the joints will result in a well-constructed and durable plywood cylinder.
Finishing and Refining the Plywood Cylinder
After the construction of the plywood cylinder, it’s important to focus on the finishing touches to enhance its appearance and durability. This section will guide you through the final steps of sanding and smoothing the surface, applying a finish or sealant, and adding any additional elements or features.
Sanding and Smoothing the Surface
To achieve a polished and professional look, sand and smooth the surface of the plywood cylinder. Start by using medium-grit sandpaper to remove any rough edges or imperfections. Gradually progress to finer-grit sandpaper to achieve a smoother finish. Ensure that you sand the entire surface evenly to maintain a consistent appearance. Don’t forget to sand the edges as well for a seamless look.
Applying a Finish or Sealant
Applying a finish or sealant enhances the aesthetics of the plywood cylinder and protects it from moisture and external elements. There are various options to choose from, such as lacquer, varnish, or paint. Select a finish or sealant that aligns with your desired look and functional requirements. Before applying the finish, make sure the surface is clean and free of dust or debris. Follow the manufacturer’s instructions for application techniques and drying times.
Adding any Additional Elements or Features
Depending on your project requirements, adding additional elements or features to the plywood cylinder may be beneficial. This could include decorative details, such as veneer or inlays, to create a unique design. Alternatively, you may opt for functional elements like handles or brackets for easier transportation or installation. Ensure that any additional components are securely attached and complement the overall design and purpose of the plywood cylinder.
Investing time and effort into the finishing and refining process can elevate the plywood cylinder from a functional piece to a visually appealing and durable component. Remember to inspect the cylinder for any imperfections and make necessary adjustments before celebrating the finished product.
Finalizing the Plywood Cylinder
Once you have completed the construction of your plywood cylinder, it’s time to finalize the project. This involves inspecting the cylinder for any imperfections, making necessary adjustments, and finally, celebrating the finished product.
Inspecting for Any Imperfections
Before considering the plywood cylinder complete, conducting a thorough inspection is crucial. Carefully examine the surface of the cylinder for any visible imperfections, such as rough spots, uneven edges, or gaps in the joints. If you come across any issues, mark them for further attention.
Making Necessary Adjustments
After identifying any imperfections, it’s time to make the necessary adjustments. Depending on the specific issues you’ve found, the adjustments may vary. For rough spots or uneven edges, use sandpaper to smooth out the surface. If there are gaps in the joints, consider applying additional adhesive and clamping the plywood again to ensure a secure bond.
Remember, precision is key when making adjustments. Take your time and make gradual changes to avoid over-correcting or damaging the plywood. If you encounter challenges during this process, consult with a woodworking professional for guidance.
Celebrating the Finished Product
Once you are satisfied with the final result of your plywood cylinder, take a moment to celebrate your accomplishment. Appreciate the craftsmanship and effort that went into creating the cylinder. Share your achievement with others who may appreciate the beauty and functionality of the plywood cylinder. Whether you plan to use it for a specific purpose or display it as a work of art, be proud of your work.
By inspecting the plywood cylinder, making necessary adjustments, and celebrating the finished product, you can ensure that your construction project is completed to the highest standards. Remember, attention to detail and precision are essential throughout the entire process. Now that you have a beautifully crafted plywood cylinder, consider exploring other woodworking techniques and projects to further expand your skills.
 Skip to content